Lead-Free Body Solder: 8 Steps to a Smooth Body Soldering Job
Lead-free body solder is quickly replacing the traditional lead body solders that have been in use for automobile restoration for decades. The reason for this pushback to lead solders is their obvious and health consequences.
Lead-free body solder, with its non-toxicity and strength, has taken away from the popularity of plastic body fillers, which were invented to replace the traditional lead-based body solders.
Restoring a vehicle’s exterior using lead-free body solder is an art that one needs to practice perfecting. And seeing the upward trend in the popularity of lead-free body solder amongst vehicle enthusiasts, we decided to dedicate to shape this article in the form of a guide for lead-free body soldering.
Body Soldering: An Introduction
Body soldering is the process of smoothing a vehicle’s exterior surface and eliminating imperfection from its panels.
This process involves the use of body solders. Body solders are metallic compounds that, when used properly, give the car, or bike a smoother surface finish.
Body solders melt and flow over the clean and smooth steel surface of the automobile and form an intermetallic compound. Hence, they form a strong bond with the panel of the car or bike and protect them from damage and corrosion.
The body soldering process is often employed before a paint job. Here, the body solders fill all the pits, hollows, seams, and cracks on the panel’s surface. Thus, providing a smooth, clean surface for the painters to do their magic.
Traditionally, body soldering employed lead-based body solders. But after the toxicity of lead and its health consequences became known, plastic fillers began to phase lead solders out. Not only that, but plastic fillers also reduced the durability and lifespan of a car restoration job.
But now, lead-free body solder has replaced plastic solders as well.
Body Solders vs Body Fillers: Why Automobile Enthusiasts Prefer Body Solders?
Plastic fillers did what they were created to do, that was to replace lead body solders. Moreover, because plastic body fillers finished the restoration job quicker than the body solders, they gained popularity.
However, plastic fillers could not compete with body solders in terms of strength and ductility, which is why lead-free body solders easily got ahead of them.
Plastic fillers tend to shrink and crack in a rough environment. Meanwhile, body solders feature better ductility and strength. Hence, they have a longer lifespan.
Moreover, plastic fillers are at risk of delaminating on impact, which will lead to fracture, damaging the restoration job. Additionally, if damaged plastic fillers are not taken care of quickly, they end up damaging the panel as well.
Apart from the fact that body solders preserve the vintage look and feel of a classic, veteran automobile. These are just some of the reasons why vehicle enthusiasts prefer body solders over body fillers.
Lead vs Lead-Free Body Soldering
The lead vs lead-free debate is unavoidable when talking about solders. Because there are always two factions. One that supports lead solders, even after knowing they are toxic. And the other that side with lead-free body solders because they are futuristic.
Traditional lead-based body solders are easier to use but consist of 20-30% tin and 70-80% lead. While using lead-based solders, you cannot sand it because sanding produces lead dust which, if inhaled, is detrimental to health.
In contrast, lead-free body solder is stronger than lead-based solders and have a wider range of working temperature. Moreover, lead-free body solder has higher tensile strength, so they are stronger and more durable as well.
Furthermore, doing a car restoration job is easier with lead-free body solders because you can sand them to smooth them out, unlike lead solder with which you are stuck with filing to shape the desired profile.
Guide to Lead-Free Body Soldering
Body soldering is an art that needs the dedication to learn. But once perfected, it yields beautiful results.
Here are a few steps that will help you kickstart your lead-free body soldering project and lead it to a successful finish:
Step 1: Paint Removal
Before body soldering can work its magic on an automobile panel, you need to strip it of its old paint to reveal your canvas, aka the steel panel that requires work.
The steel panel must be free from old paint, dust, dirt, and grease for which it needs to undergo a thorough paint-removal process.
When stripping paint from the steel panel, you normally have two options. You can either remove the paint using a chemical paint stripper, which is a long and tedious process. Or you can go for an electric paint-removing wheel that abrades the surface. The abrasive wheel will remove the old paint, decals, and any rust that had been on the panel in no time.
Step 2: Sealing the Seams
After you have successfully removed the paint from the panel, you will see the imperfections on the panel, the seams that need covering, and pits that need filling.
To cover the seam and pits, pop open the box of solder paint and apply a thin, uniform layer of it all across the joint or pit. Make sure to use a natural brush because the bristles of a synthetic brush might melt if the surface is hot.
Solder paint is an amalgamation of acid-based solder flux and powdered lead-free solder. The flux cleans the metal surface and prevents oxidation at high temperatures.
Step 3: Tinning
Now that you have applied the solder paint, grab a flame thrower or torch and heat the it by moving the torch up and down the joint where you have applied the paint.
Heating the paint will cause the solder to melt and flow. Make sure to keep moving the torch along the joint so that the paint heats up evenly.
To ensure good tinning, remove the flame from the painted area and wipe it from time-to-time to remove any excess solder and flux that may accumulate on heating.
Step 4: Soldering
While you heat the solder paint during tinning, you will notice it changes color on heating. Once you are done with tinning, it's time to get to soldering.
Melt the lead-free body solder using the flame torch and drop it over the tinned steel. Make sure to heat the tinned steel panel and the molten solder drop simultaneously so that it can spread easily.
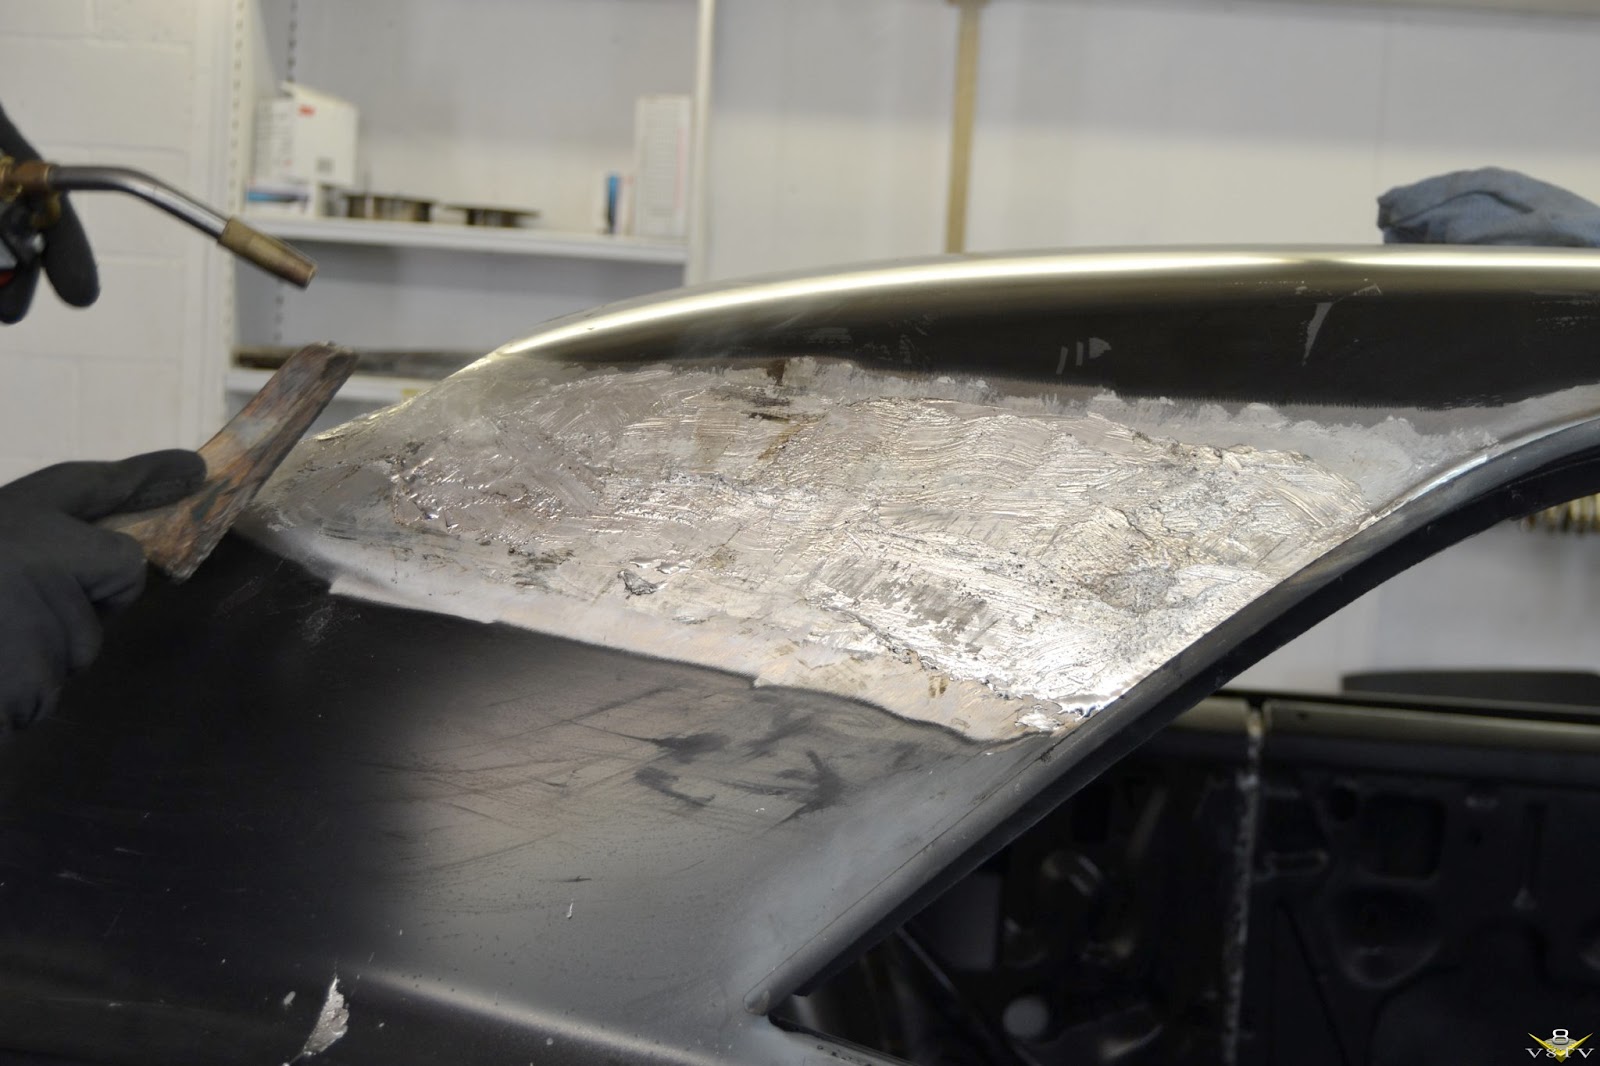
You can use a wooden paddle to spread the molten solder over the heated, tinned steel panel. But make sure to grease the paddle so that the solder does not stick to it.
Step 5: Cleaning the Flux
Once you are done with the primary soldering, you’ll be left with excess solder and flux. While filing will take care of the excess solder, you will have to clean up the excess flux before it can lead to premature corrosion of the surface.
Acid-based flux can easily be cleaned with water, so a damp cloth would suffice to wipe-off the left-over flux.
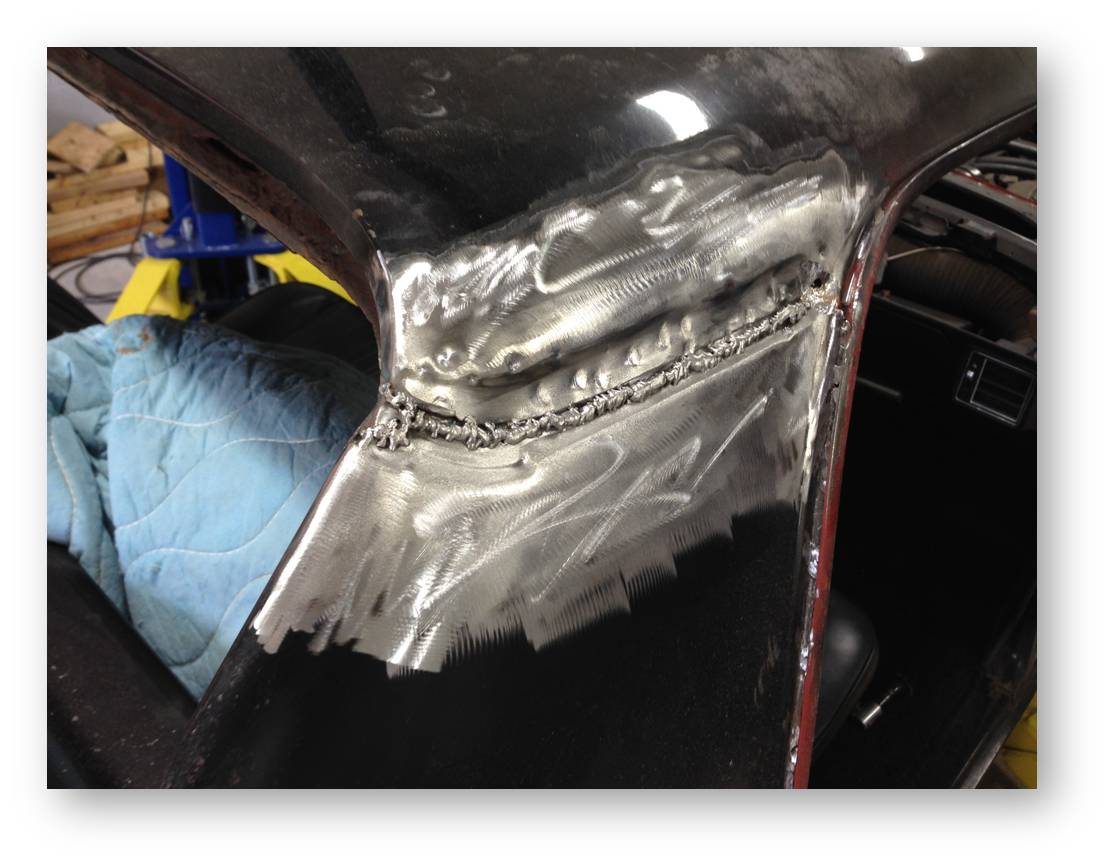
Step 6: Filing
Filing removes the excess solder and forms the desired profile of the steel panel. Additionally, filing off leftover solder also reveals areas that may require a secondary soldering process.
For filing, you can use an 8-10 TPI file. Give the file a gentle push in the forward direction. This push should scrape off the excess solidified solder. Continue filing until you have achieved your desired panel profile.
Step 7: Secondary Soldering
As we mentioned above, filing may reveal some pits and hollows that you missed during primary soldering. To fill these imperfections, you need to do second soldering the same way you did primary soldering above.
Step 8: Sanding
Sanding is the big advantage of lead-free body solder. Sanding removes excess solder, rust, and the paint that you might have left in step ones. Moreover, sanding, like filing, also reveals any remaining defects so that you can fill them up and eliminate them with body solders, torch, flux, and maybe some baker’s fluid.
Even though the dust generated from sanding lead-free body solder is harmless, it is still imperative for you to wear a dust mask to protect yourself from inhaling metallic dust.
Conclusion
Lead-free body solder is the next generation of body soldering. It has no health hazards and is durable unlike lead-based solders and plastic fillers.
The art of body soldering using lead-free body solder requires some practice. Hopefully, with the help of the steps mentioned above, you’ll be able to practice body soldering and learn to do an automobile restoration job with perfection.
For More Information, Contact Us Today!

